Table of Contents
- Why Rekey Your Home Locks?
- Rekeying vs Replacing Door Locks: What’s the Difference?
- What You Need: The Lock Rekeying Kit and Tools
- Step-by-Step: How to Rekey Residential Locks
- Cost to Rekey Locks: DIY vs Professional
- Common Mistakes and How to Avoid Them
- When to Call a Professional Locksmith
- Frequently Asked Questions
Last Updated: September 9, 2026
Why Rekey Your Home Locks?
Rekeying a lock changes which key operates it without replacing the entire mechanism, and it is one of the most practical security upgrades a homeowner can make. Moving into a new house is the classic trigger: you have no idea who still holds copies of the old keys, from tradies to previous owners. According to Joplin Lock and Key, rekeying is frequently cited as a cost-effective alternative to replacing entire lock mechanisms when securing a new property.
Beyond moving in, rekeying makes sense after a breakup, a lost key, or when a housemate moves out, restoring your control over who can enter your home.
Rekeying vs Replacing Door Locks: What’s the Difference?
The core difference comes down to the lock cylinder versus the entire lock hardware. Rekeying residential locks means altering the internal pin configuration so a new key works, while the exterior hardware stays exactly as it is. Replacement involves removing the whole lock set, including the deadbolt or doorknob, and installing fresh hardware.
| Factor | Rekeying | Replacing |
|---|---|---|
| Cost | Lower; service fee per cylinder | Higher; new hardware plus labour |
| Time | 15-20 minutes per lock | 30-60 minutes per lock |
| Hardware | Keeps existing locks | New deadbolts and knobs |
| Security level | Same physical mechanism | Can upgrade to higher grade |
A common misconception is that rekeying improves physical security. It does not. As Front Range Locksmith points out, rekeying only changes key access; it does not upgrade the physical security or the number of pins within the lock mechanism. If your lock is worn, damaged, or low quality, replacement is the better call. If the hardware is solid and you just want control over the keys, rekeying wins on price and simplicity.
What You Need: The Lock Rekeying Kit and Tools
Lock Compatibility: Not Every Cylinder Can Be Rekeyed
Rekeying works on pin-tumbler cylinders, which cover the vast majority of residential deadbolts and doorknobs in Australia. Notable exceptions include:
- Locks with a fixed or sealed cylinder, some budget deadbolts, particularly older or imported models, are assembled with pressed-in retaining pins that cannot be removed without destroying the housing. If you cannot locate a retaining clip or screw at the rear of the cylinder, it is likely not serviceable.
- Locks with a sidebar or dimple keyway, high-security cylinders such as those from Abloy, Assa, or Lockwood’s higher-end ranges use a different mechanism entirely. These are not compatible with standard rekeying kits and should be handled by a locksmith.
- Locks with a ‘smart’ or electronic keypad, if your deadbolt is motorised or uses an electronic thumb-turn, there is no physical cylinder to rekey. You would instead be reprogramming the keypad code, which is a different process.
A quick compatibility checklist: remove the interior mounting screws and pull the lock body away from the door; look for a small retaining clip or screw at the rear of the cylinder, if present, it is likely serviceable; check the keyway shape, a standard pin-tumbler key has a single row of cuts along one edge, and if the key has cuts on both edges, dimples, or a complex profile, stop and call a professional; identify the brand, most Australian residential locks are from Lockwood, Gainsborough, or Whitco, and your rekeying kit must match the brand’s pin diameters and keyway.
The Rekeying Kit: What Is Actually Inside
A standard rekeying kit for a specific brand contains new key pins, driver pins, and springs, organised by pin size with each length corresponding to a cut depth on your new key. For a standard five-pin cylinder, you will need five of each per lock.
What most kits do not include are the tools. You will need to source these separately:
| Tool | Purpose | Essential? |
|---|---|---|
| Plug follower | Pushes the plug out of the cylinder housing while keeping driver pins and springs contained | Yes, non-negotiable |
| Retaining clip removal tool | Small flathead screwdriver or specialised pick to pop the C-clip at the rear of the cylinder | Yes |
| Tweezers or needle-nose pliers | Handling tiny pins and springs without dropping them | Yes |
| Pinning tray or magnetic mat | Organising pins in order as you remove and insert them | Strongly recommended |
| Small hammer or mallet | Tapping the plug follower if it sticks | Optional |
Tool Kits vs. Individual Tools: What Is Worth the Money
Retailers sell ‘complete’ rekeying kits that bundle the pin assortment with a plug follower, clip remover, and tweezers, but these often include low-quality tools that bend or slip. Experienced DIYers typically buy the pin assortment separately and invest in a decent brass or steel plug follower, which costs around $10 to $20 and lasts for dozens of locks.
A plug follower must match the diameter of your cylinder plug; most residential cylinders use a standard size, but some brands vary, so measure the plug’s diameter before ordering if buying tools individually.
A magnetic parts tray, the kind used for screws and small engine parts, is one of the best investments you can make for this job. Pins and springs are small enough to vanish into carpet or a workbench crack, and a tray with a raised lip keeps everything contained.
Brand-Specific Notes for the Australian Market
- Lockwood, the most common residential brand in Australia. Lockwood cylinders use a standard pin size, and kits are widely available from locksmith suppliers and hardware stores. Look for the Lockwood 001 or 002 series deadbolts, which are straightforward to rekey.
- Gainsborough, another common Australian brand, particularly in newer builds. Gainsborough cylinders are generally serviceable, but the retaining clip can be tight; use a proper clip removal tool rather than forcing a screwdriver.
- Kwikset SmartKey, if your lock has the SmartKey logo on the faceplate, you do not need a traditional rekeying kit at all. Kwikset’s SmartKey system allows you to rekey the lock in under a minute using a special reset tool and the new key, with no disassembly required. This is a genuine exception to the standard process.
If unsure of your lock’s brand, remove the cylinder and look for a stamp on the side of the housing. If you cannot identify it, do not order a kit, take the cylinder to a locksmith supplier and ask them to match it.
Step-by-Step: How to Rekey Residential Locks
Rekeying residential locks follows a repeatable sequence: remove the cylinder, extract the plug, swap the pins, and reassemble. Before you start, confirm you have the correct replacement pins for your lock brand and a working space with good lighting. Lay out a towel to catch small springs and pins.

Step 1: Remove the Lock Cylinder
Start by removing the lock from the door. For a deadbolt, unscrew the two screws on the interior side and pull the assembly apart. For a doorknob, release the retaining pin on the shank to slide the knob off. Once the lock body is free, locate the retaining clip or screw that holds the cylinder in place.
Remove the clip with a small flathead screwdriver or the specialised tool from your kit. The cylinder should now slide out of the housing. If it resists, check for a second retaining screw you may have missed.
Step 2: Remove the Retaining Clip and Plug
With the cylinder in hand, look for the small retaining clip at the back end. Remove it carefully and set it aside. Insert the key that currently operates the lock, then use the plug follower to push the plug out from the rear of the cylinder housing.
The plug follower is critical here: it keeps the driver pins and springs inside the housing from flying out as you remove the plug. Work over your towel and apply steady, even pressure. If the plug sticks, rotate the key slightly to align the pins at the shear line before pushing again.
Step 3: Replace the Tumbler Pins
Once the plug is out, dump the old key pins from the plug and remove the old driver pins and springs from the housing. The plug has a row of holes along its top; these hold the key pins.
Insert the new key pins from your rekeying kit into the plug, matching each pin’s length to the cuts on your new key. The correct pin stack should sit flush with the plug’s surface when the key is inserted. Then reload the driver pins and springs into the housing, keeping them in order.
Step 4: Reassemble and Test
Insert the new key into the plug and slide the plug back into the cylinder housing, rotating the key gently to align the pins. The plug should slide in smoothly if the pins are correctly matched. Replace the retaining clip on the rear of the cylinder.
Reinstall the cylinder into your lock body and mount everything back on the door. Test the new key several times, both locking and unlocking. Then test the old key: it should no longer turn the lock. If the old key still works, a pin is mismatched, and you will need to disassemble and recheck the pin stack.
Cost to Rekey Locks: DIY vs Professional
The cost to rekey locks varies significantly depending on whether you go DIY or hire a professional. A rekeying kit costs between $15 and $50 per cylinder, according to Valley Lock and Door, making it the budget-friendly option if you have the tools and patience.
Professional rekeying services cost between $191 and $225, based on Thumbtack’s 2026 locksmith pricing estimates. That figure covers the locksmith’s time, expertise, and the new pins. Compare that with the average cost to replace a lock entirely, which runs around $315 according to Angi’s 2026 cost guide, and you can see why rekeying is often the smarter financial move.
The average time to rekey a single lock is 15 to 20 minutes for a professional, as noted by Meyers Local Locksmith. For a DIYer, budget 45 to 60 minutes for your first lock, and expect a learning curve if you have never handled a plug follower before.
Common Mistakes and How to Avoid Them
Mistake 1: Pins Fall Out and Scatter the Moment You Remove the Plug
What happens: You slide the plug follower out, and instead of a clean handoff, springs and driver pins launch across the room.
Why it happens: The plug follower is not doing its job. Either it is the wrong diameter, too small, allowing pins to slip past it, or you removed the plug before the follower was fully seated against the rear of the housing.
How to recover: Stop. Do not chase pins across the floor. Work over a towel or tray so the parts land within reach. If a spring or pin is lost, do not improvise with a random spring from another lock, the tension will be wrong. Order a replacement from a locksmith supplier (they cost cents each) before continuing.
How to prevent it: Confirm your plug follower matches the plug diameter before you start. When pushing the plug out, keep steady, even pressure and do not stop halfway.
Mistake 2: The Plug Will Not Slide Back In
What happens: You have swapped the pins, inserted the new key, and now the plug refuses to go back into the housing.
Why it happens: The driver pins in the housing are not aligned at the shear line.
How to recover: Do not force it. Forcing the plug can bend the pins or score the inside of the housing, permanently ruining the cylinder. Instead, remove the plug, check that all driver pins and springs are seated correctly in the housing, and try again. Rotate the key slightly as you push.
How to prevent it: Before inserting the plug, visually inspect the housing. Each driver pin should sit flush with the inside wall of the housing, with its spring compressed above it.
Mistake 3: The Old Key Still Works After Rekeying
What happens: You reassemble everything, test the new key, it works. Then you try the old key, and it also turns the lock.
Why it happens: One of the key pins in the plug is the wrong length.
How to recover: Disassemble the cylinder again. Remove the plug and check each key pin against the new key. Insert the key into the plug and look at the top of the plug, each key pin should sit flush with the plug’s surface. If any pin is proud or recessed, swap it for the correct size from your kit.
How to prevent it: Lay out the new key pins in order on your workbench before inserting them. Match each pin to the corresponding cut depth on the key. Most kits include a pin size chart, use it rather than eyeballing lengths.
Mistake 4: The Retaining Clip Will Not Go Back On
What happens: You have reassembled the cylinder, but the C-clip at the rear will not snap back into its groove.
Why it happens: The plug is not fully seated in the housing.
How to recover: Push the plug further into the housing. If it will not move, the pins are misaligned, go back to Mistake 2 and check the driver pins. Once the plug is fully seated, the clip groove will be visible and the clip will slide on with light pressure.
How to prevent it: After inserting the plug, rotate the key back and forth gently while pressing the plug forward.
Visual Checklist: What a Correctly Rekeyed Lock Looks Like
Before reinstalling the cylinder on the door, run through this checklist:
- The plug sits flush with the front of the cylinder housing, no gap, no protrusion.
- The retaining clip is fully seated in its groove and does not move when you wiggle it.
- The new key inserts smoothly and turns without excessive force.
- The old key inserts but does not turn, it may stop at the 45-degree mark.
- When the new key is inserted and turned to the locked position, the bolt extends and retracts cleanly.
If the plug is stuck halfway out of the housing and will not move in either direction, do not keep pushing. You may have a driver pin wedged between the plug and the housing wall. Gently tap the housing on a soft surface to dislodge it, or take the cylinder to a locksmith. A jammed plug is recoverable, but forcing it will likely destroy the cylinder.
The 10-Minute Rule
If you have been working on the same lock for more than 10 minutes and the plug is still not cooperating, step away. Take a break, re-read the steps, and come back with fresh eyes. Most rekeying failures are the result of rushing or frustration, not a fundamental problem with the lock. If after a second attempt the lock still will not function, it is time to call a professional.
When to Call a Professional Locksmith
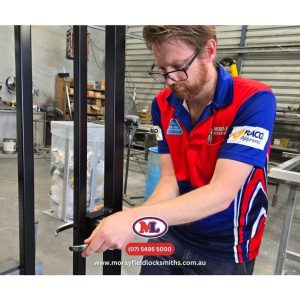
DIY rekeying works well for a single lock on a standard door, but several situations call for professional help. If you have multiple locks that need to match one key, a process called keying alike, the precision required goes up considerably. A professional can re-pin all your cylinders so a single key operates every lock.
Master keying systems, where individual locks have their own keys but a single master key opens them all, are another job best left to experts. These systems require careful planning of the pin stacks.
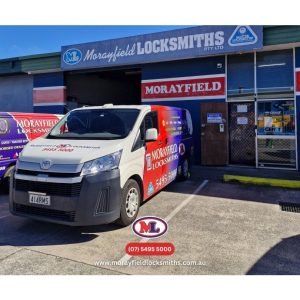
If your locks are old, corroded, or from an uncommon brand, a professional can assess whether rekeying is even viable or whether replacement is the better option. A locksmith also brings the right tools and experience to handle complications, such as a seized retaining clip or a stripped screw. For homeowners in the Moreton Bay region, Morayfield Locksmiths offers fast, reliable rekeying and lock replacement services, backed by honest upfront pricing and a family-owned reputation built since 1994.
Rekeying residential locks is a satisfying DIY project that saves money and restores your control over home security, but it demands patience and precision. Whether you tackle it yourself or call in an expert, the outcome is the same: a home where only the right keys work. For complex jobs, multiple locks, or master keying systems, Morayfield Locksmiths provides professional expertise with rapid response times and modern security knowledge. Call Now! and secure your home with confidence.
Frequently Asked Questions
Can I rekey my locks myself?
Yes, if you have the right tools. A lock rekeying kit and a plug follower are essential. The process takes 15-20 minutes per lock once you have removed the cylinder. Follow the manufacturer’s instructions for your specific lock brand. If you feel unsure at any step, a professional locksmith can complete the job quickly and correctly.
Is it better to rekey or replace residential locks?
Rekeying is often the better choice when the existing hardware is in good condition. It is a cost-effective way to secure your home after moving in or if you have lost a key. Replacing is necessary if the lock is damaged, worn, or you want to upgrade to a higher security standard, such as deadbolts or smart locks.
What tools are needed to rekey a lock?
A lock rekeying kit matched to your lock brand is the primary requirement. You will also need a plug follower, a small flathead screwdriver, and tweezers or needle-nose pliers. The kit contains the new key pins, driver pins, and springs. Having a clean, well-lit workspace helps prevent losing small parts.
How much does it cost to rekey a lock cylinder?
The cost to rekey locks varies. A DIY lock rekeying kit is a low-cost option. Hiring a professional locksmith involves a service call plus a fee per cylinder, which can add up for multiple locks. For an accurate quote based on your number of locks, contact Morayfield Locksmiths directly.